Step 1
Depending on your operating system, locate the network connection icon. For MacOS, this will be on the top right of your screen (Menu Bar). For Windows, this will be on the bottom right of your screen (Task Bar). (Important Note: You can find it near the time display)

Windows

MacOS
Step 2
From the list of WiFi networks, select the "Pacific College Wireless Network".
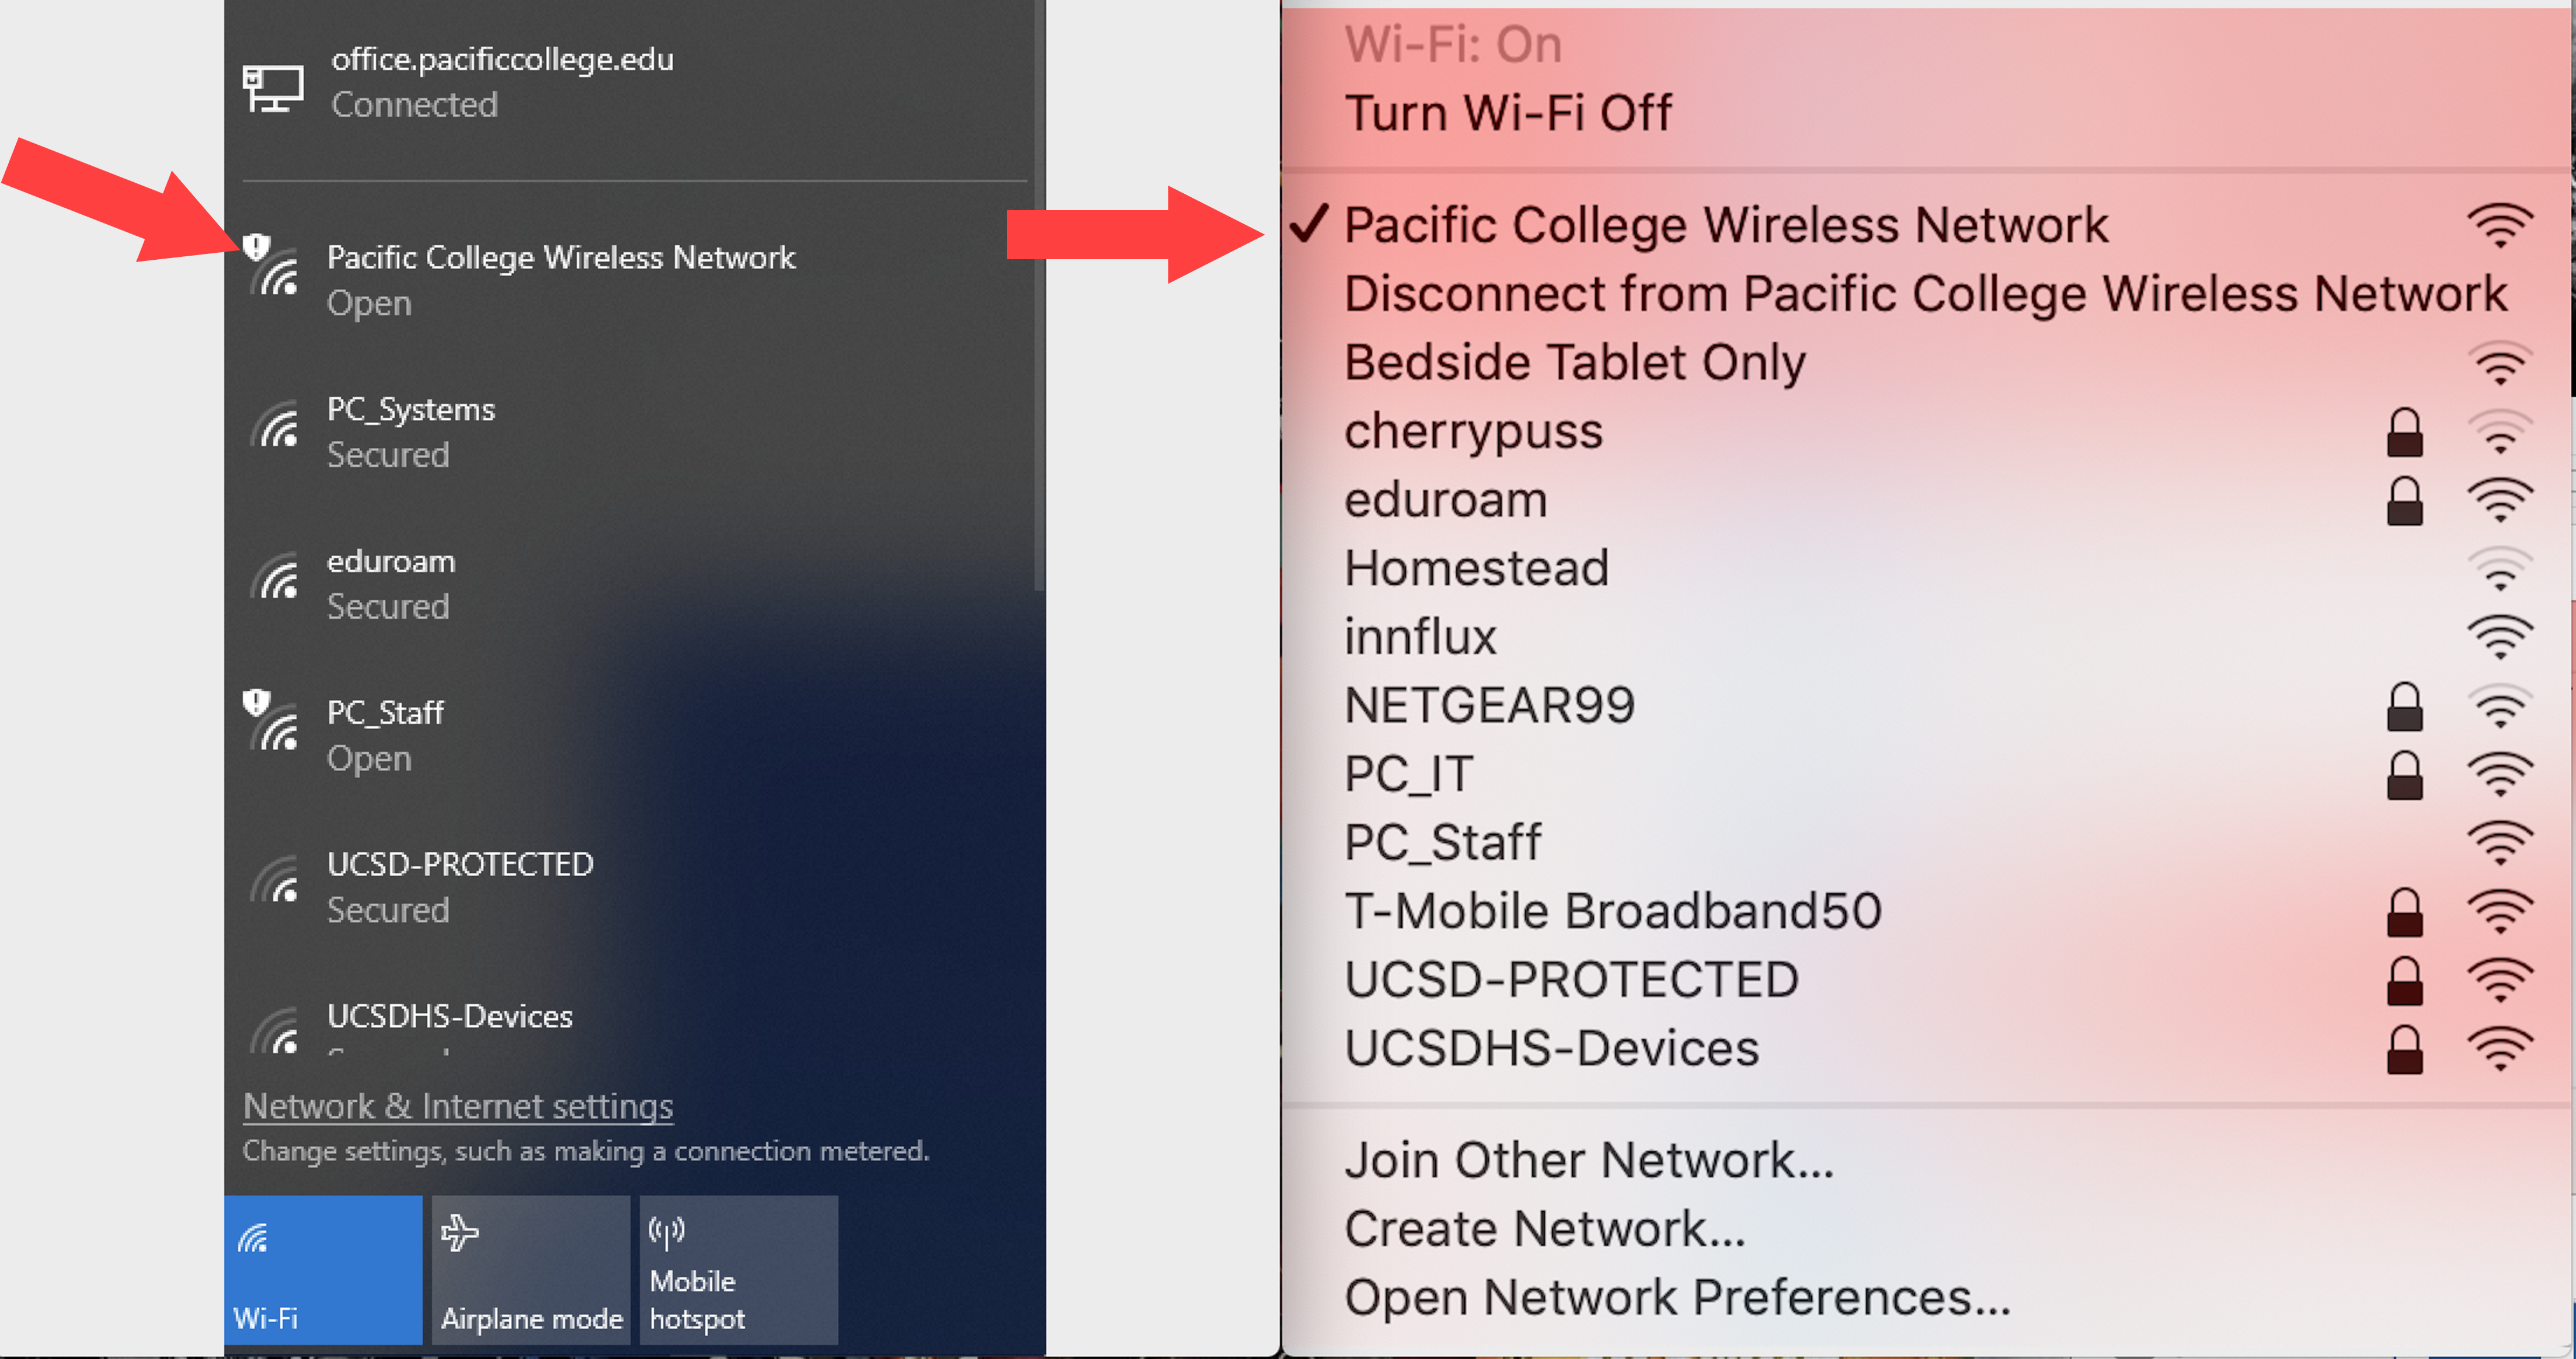
Windows 10 MacOS
Step 3
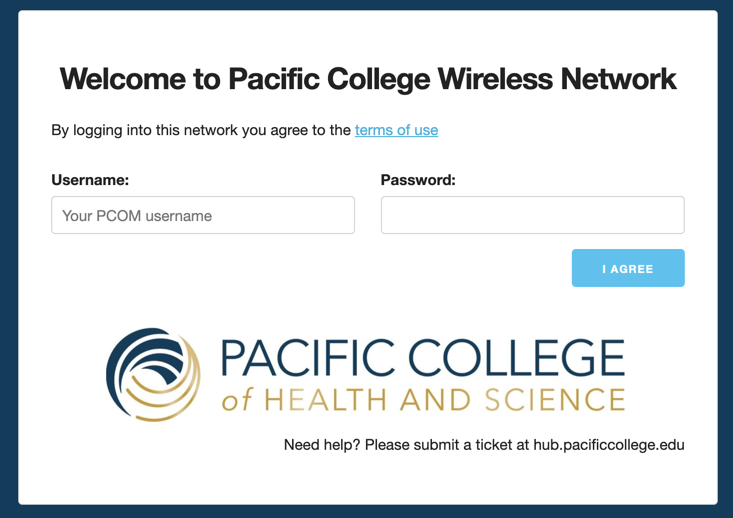
After you've connected A splash screen will appear and prompt you to log in with your Pacific College Username and password along with this screen is a link to our network terms of use. If you haven't done so log in by clicking "I agree" for the terms of use. For Windows users, this splash screen will appear in your default browser instead of its own screen. It will look like these windows below.
Step 4
At this point, you are able to access the internet. You will be greeted with a Pacific College network welcome screen from the Pacific College home website.

Important Notice
If you do not have any network connection after signing in, please check if you have any VPNs or other related software running. The use of one will automatically disable your network connection. Please turn it off immediately, then check your network connection right after. If in the case your Wi-Fi does not continue, please submit a ticket below to reach out to the IT helpdesk.