If you are a Non-Matriculated, Public Education, or Preparatory Course Options student, please contact an Academic Advisor for assistance to register for courses.
Log in to your CampusVue Portal. You can navigate to the CampusVue portal through your the Student Hub or by copying and pasting this address in your browser: portal.pacificcollege.edu.
 Step 1.
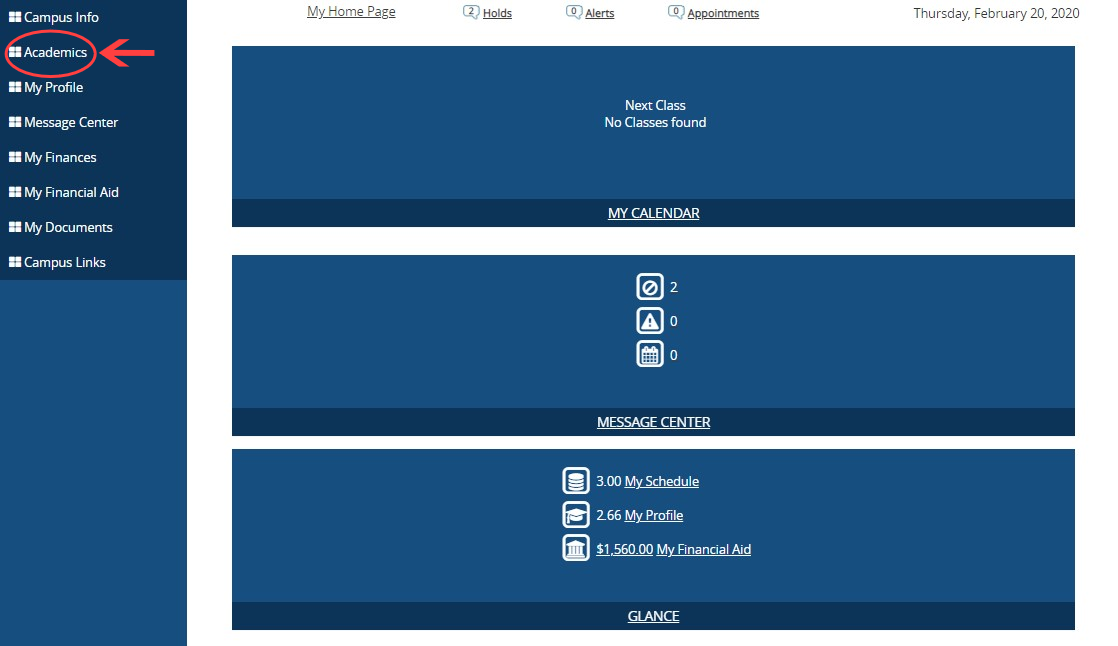
Once logged into the Student Portal, you will want to find the menu on the left-hand side of the page labeled "Academics" (highlighted below). Click the link.
Step 2.
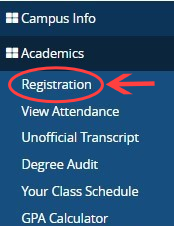
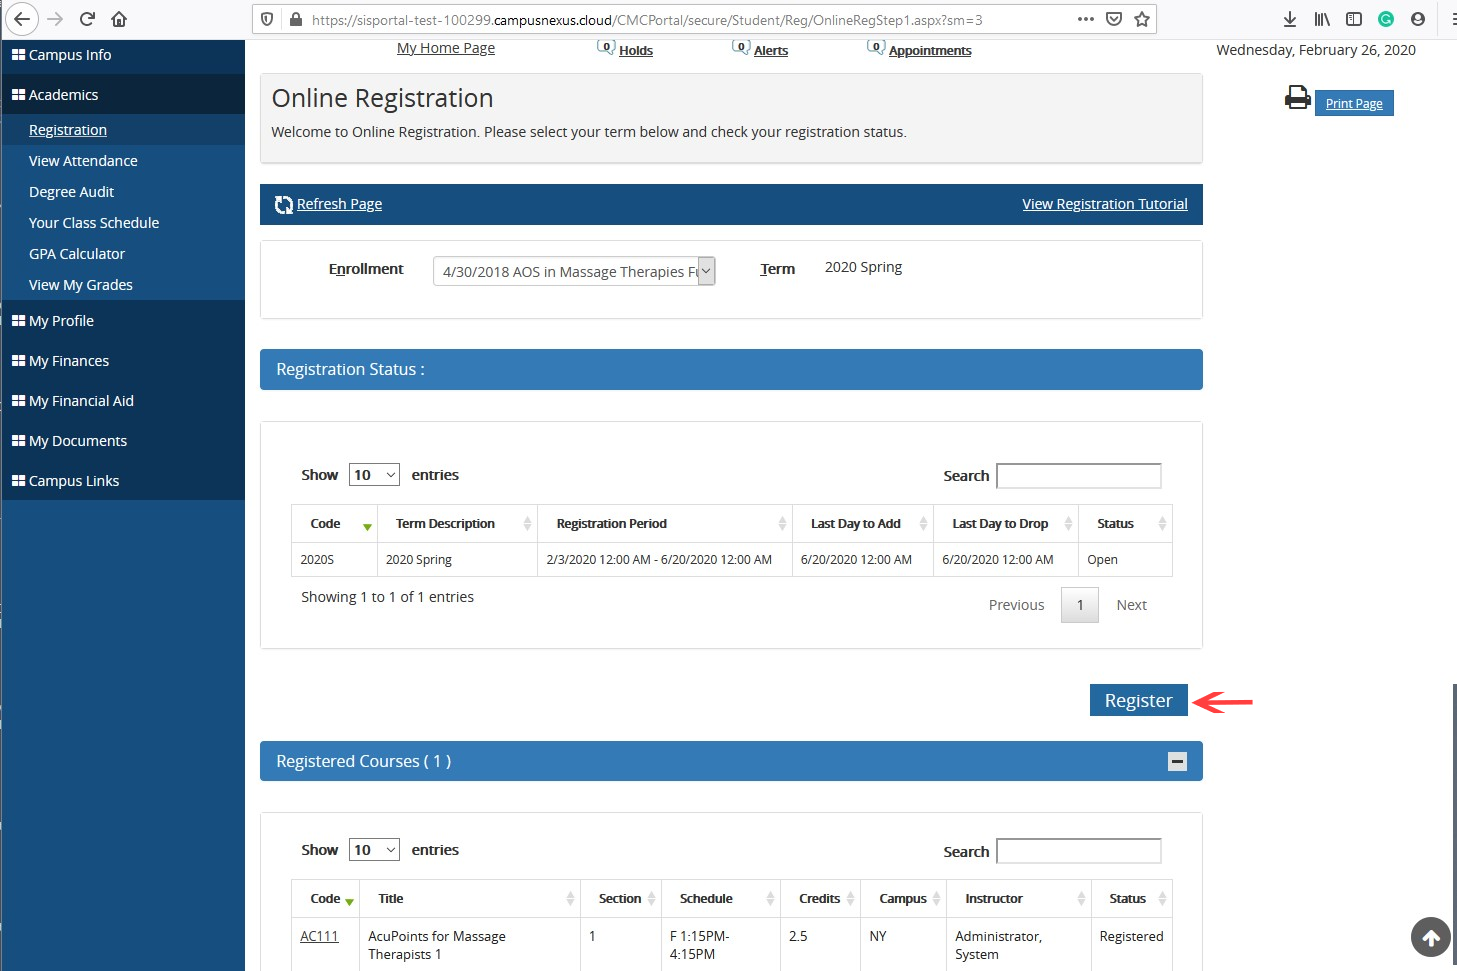
Beneath Academics, click "Registration."
Step 3.
Select an Enrollment. If only one enrollment exists, the enrollment is already selected.
Select a Term. If only one term exists, the term is already selected.
Enrollment and term selection determines your online registration status.
Your Registration Status for the selected term and enrollment is displayed.
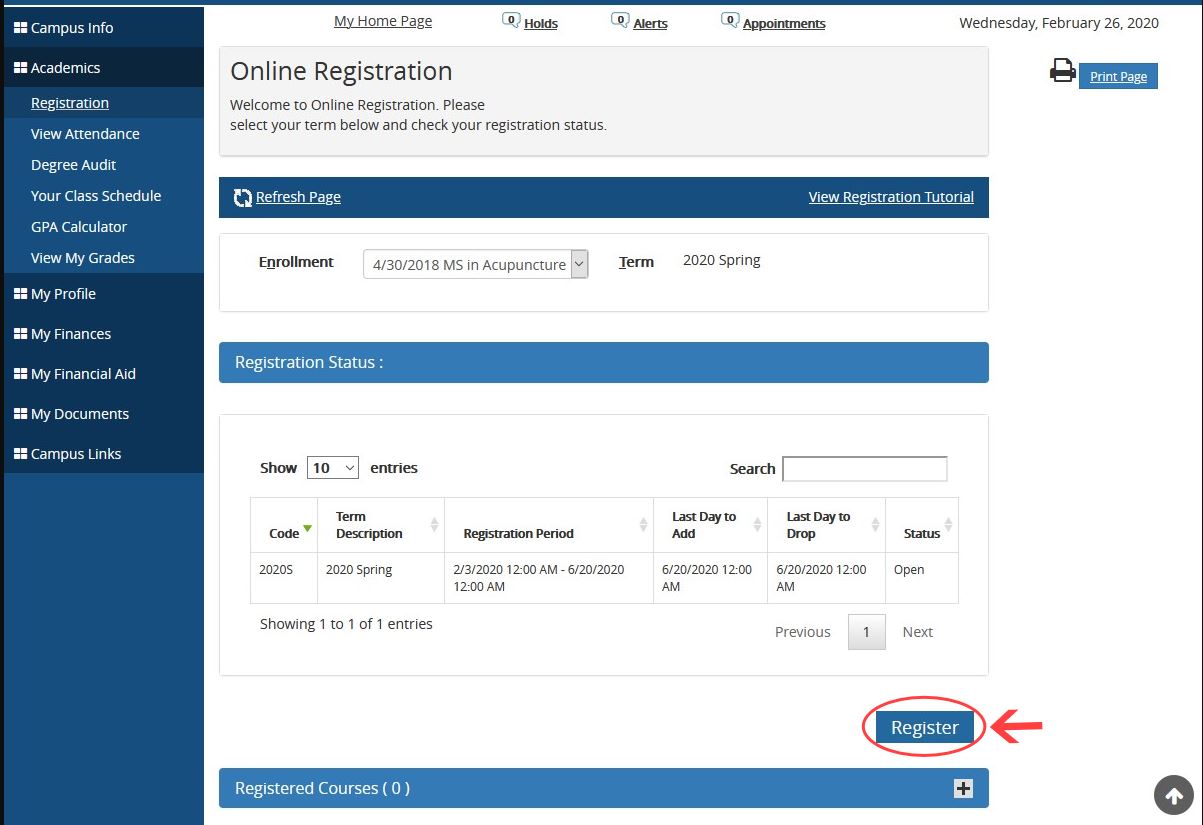
Registration Status information includes the following:
- Registration Period - the dates you can register for courses for this enrollment and term.
- Last Day to Add - courses must be added to this enrollment and term no later than this date.
- Last Day to Drop - courses must be dropped from this enrollment and term no later than this date.
- Status - the status for this enrollment is Open (available for online registration) or Closed (not available for online registration).
Verify the information displayed. If your information is correct, you may begin to register.
Select "Register" to add and drop classes.
Step 4.
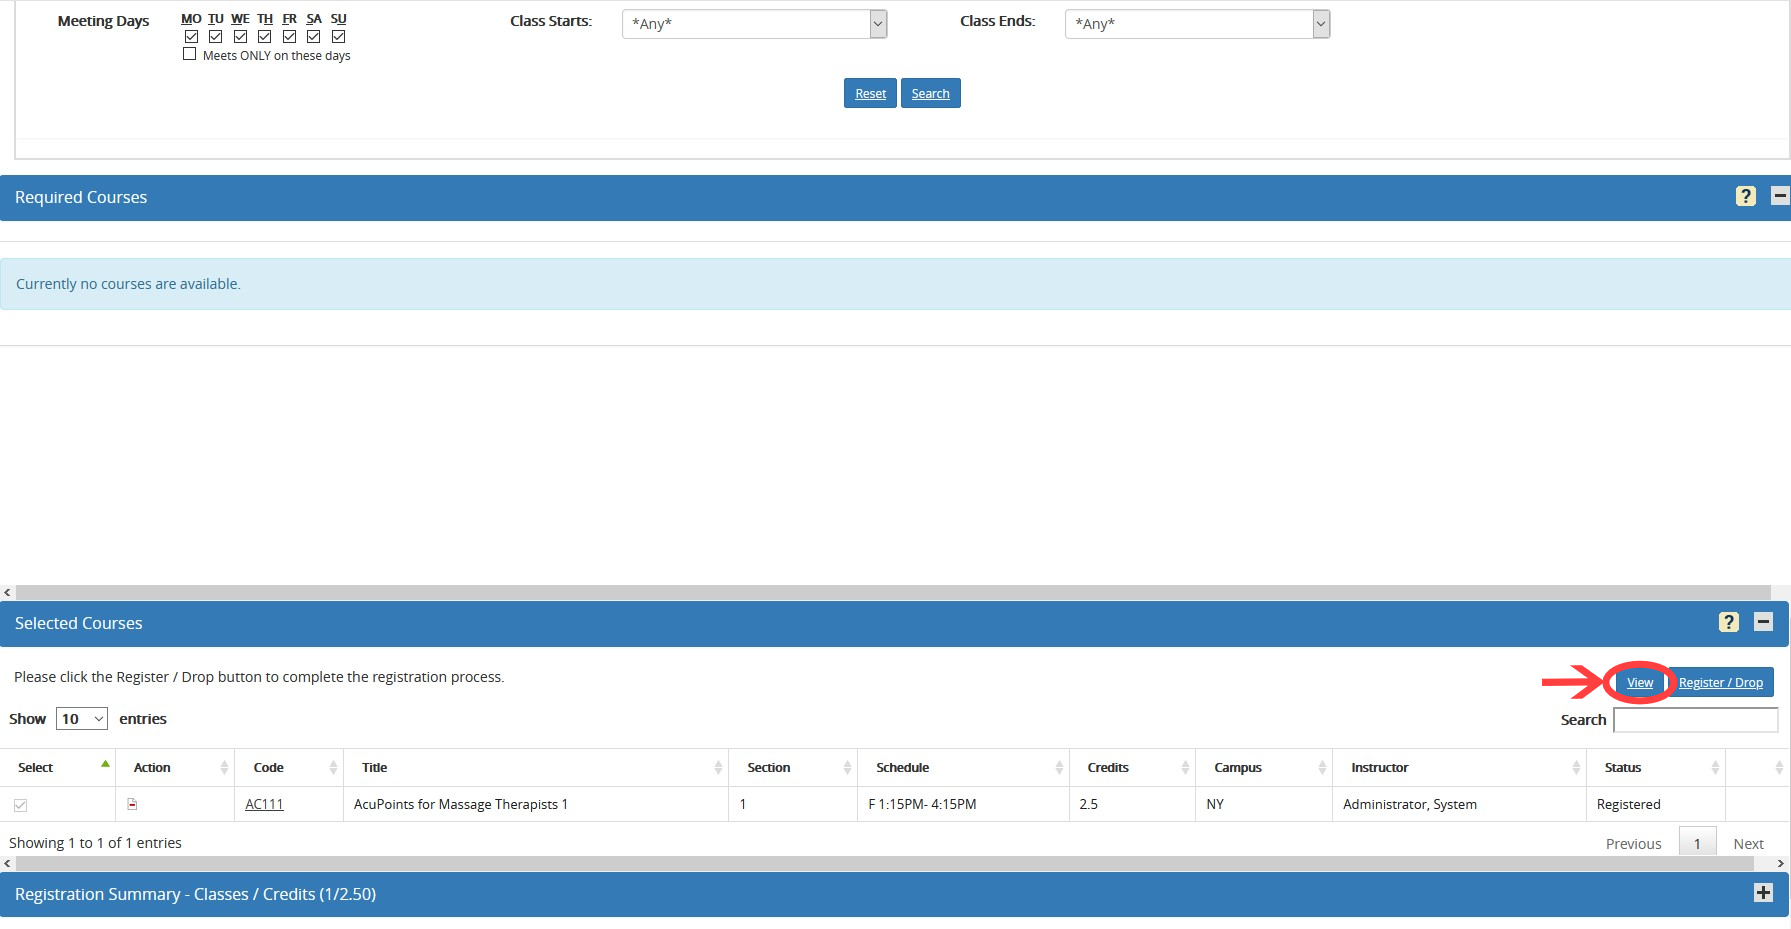
A new window will pop up. If it does not, please check that your browser does not have pop-up windows blocked. Select the course section that you would like to register for by selecting the green ➕ sign. If there is more than one section of a course being offered, the screen will expand to show you the options available.
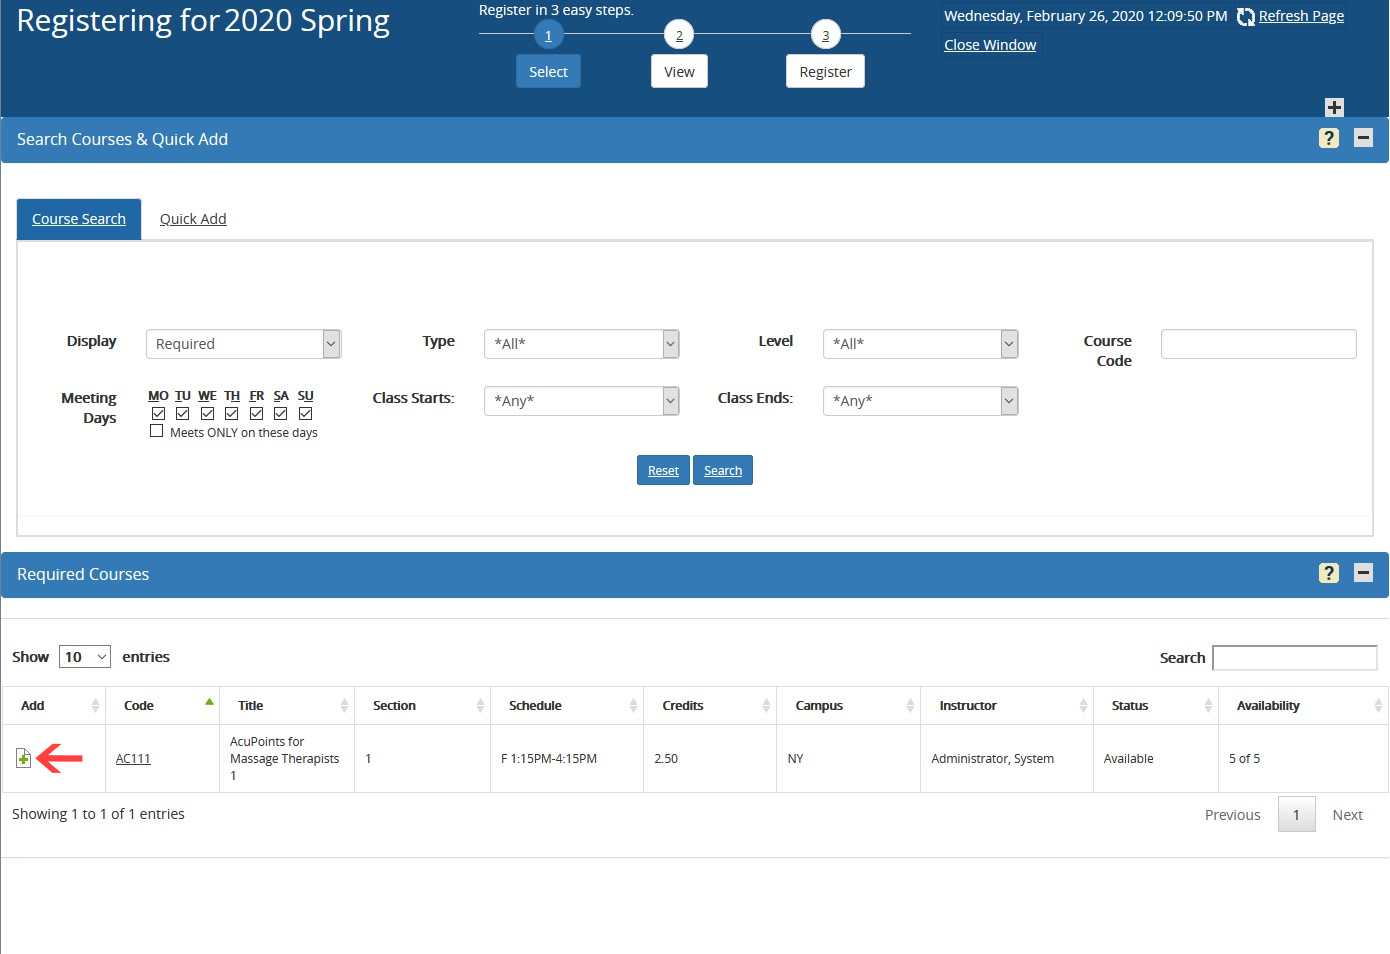
For each section, the following fields are displayed:
Add - The (add) icon is displayed as long as the section is available for registration. Click to select that course/section. If there are prerequisites for the course, a 'PreReq' link is displayed. You cannot register into the course unless all of the prerequisites rules including, required courses and any testing requirements (if applicable,) are met.
Code- Course code for the course.
Title- The name of the course.
Section- Section number for a specific day and time for a course.
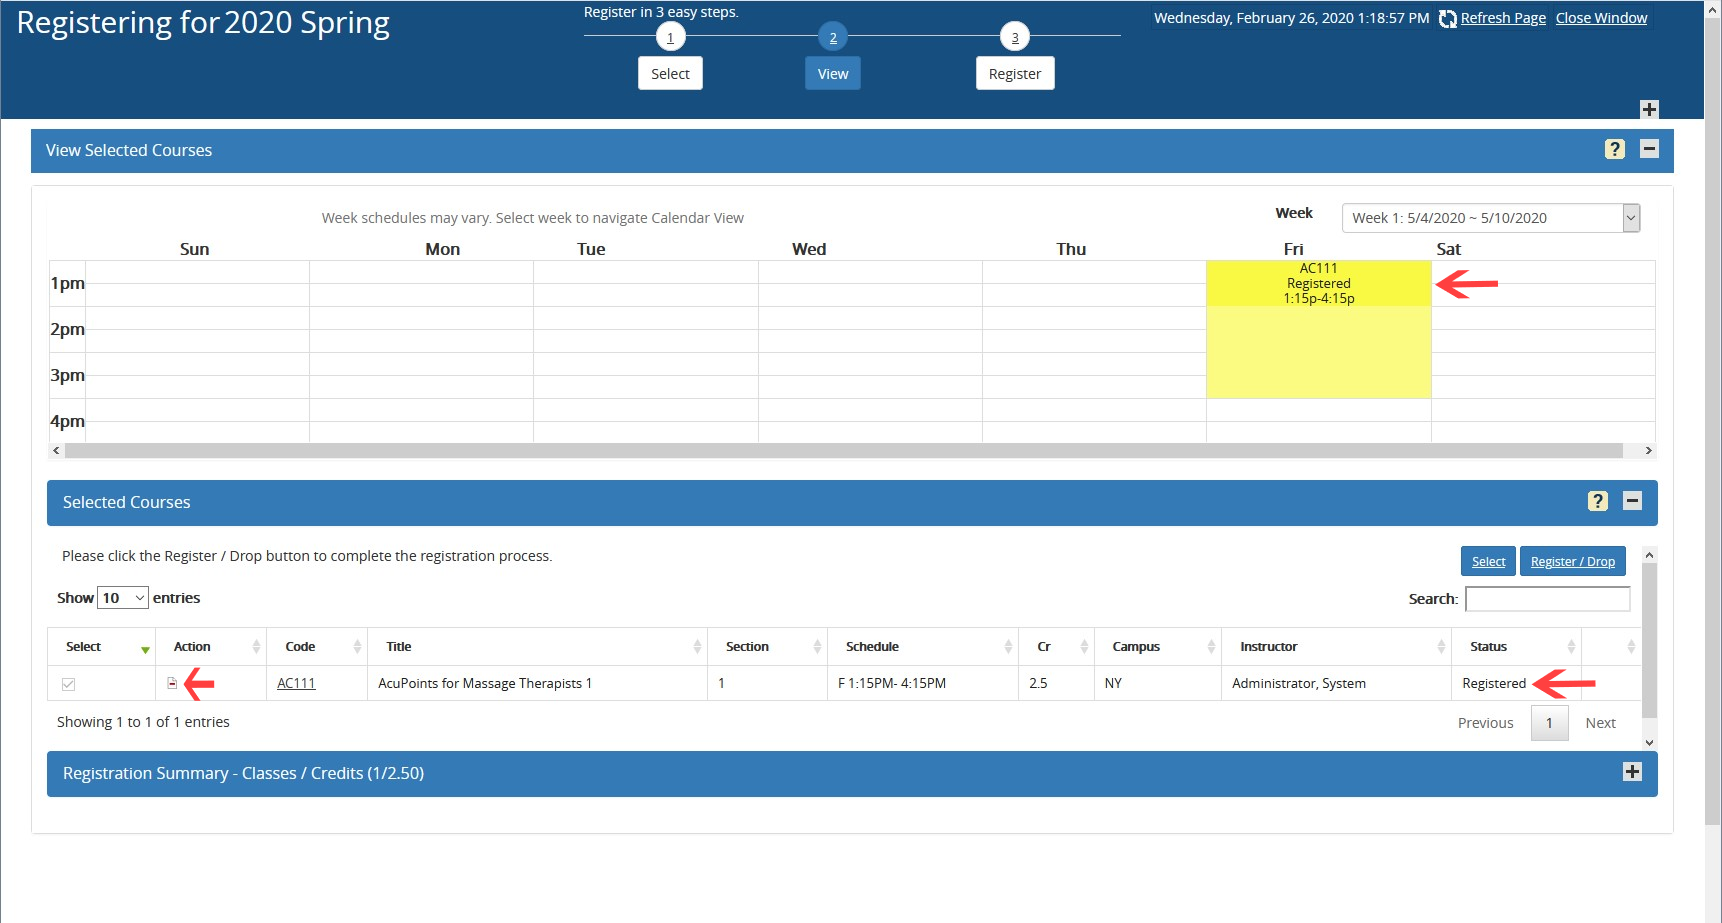
Schedule - The days and times that the section meets are displayed. Click the link to view a monthly calendar displaying the dates that the section meets.
Credits- Number of credits for the course.
Instructor - The name of the instructor teaching the section is displayed.
Status - A section may be listed as Available, Full, Closed, Pending Drop, or PreReq.
Availability- Seating status may be listed as Available (with several seats available at the moment. Enrollments change as students register for courses. Enrollments are not confirmed until your status reflects registered) or Closed.
If the final date for registration has passed, the status is Closed.
A course section is labeled as Full when no seats are available.
If a course has a co-requisite or prerequisite, click the Co-Req/PreReq link in the Status column to view prerequisites and corequisites required for the course. When registering in a course that has co-requisites, you must register in all co-requisite courses at the same time before proceeding. Please consult the model curriculum/chart of courses.
You are not allowed to register for a course if you do not meet all prerequisites or are not registered in a course that enables you to meet the prerequisites before the beginning of the course in which you are attempting to register. Please consult the model curriculum/chart of courses.
Step 5.
Once you select the add button for a specific course section, the selected courses will move from the "Required Courses" section to the "Selected Courses" section. Under "Selected Courses," Select "Register/Drop" to move to the next screen.
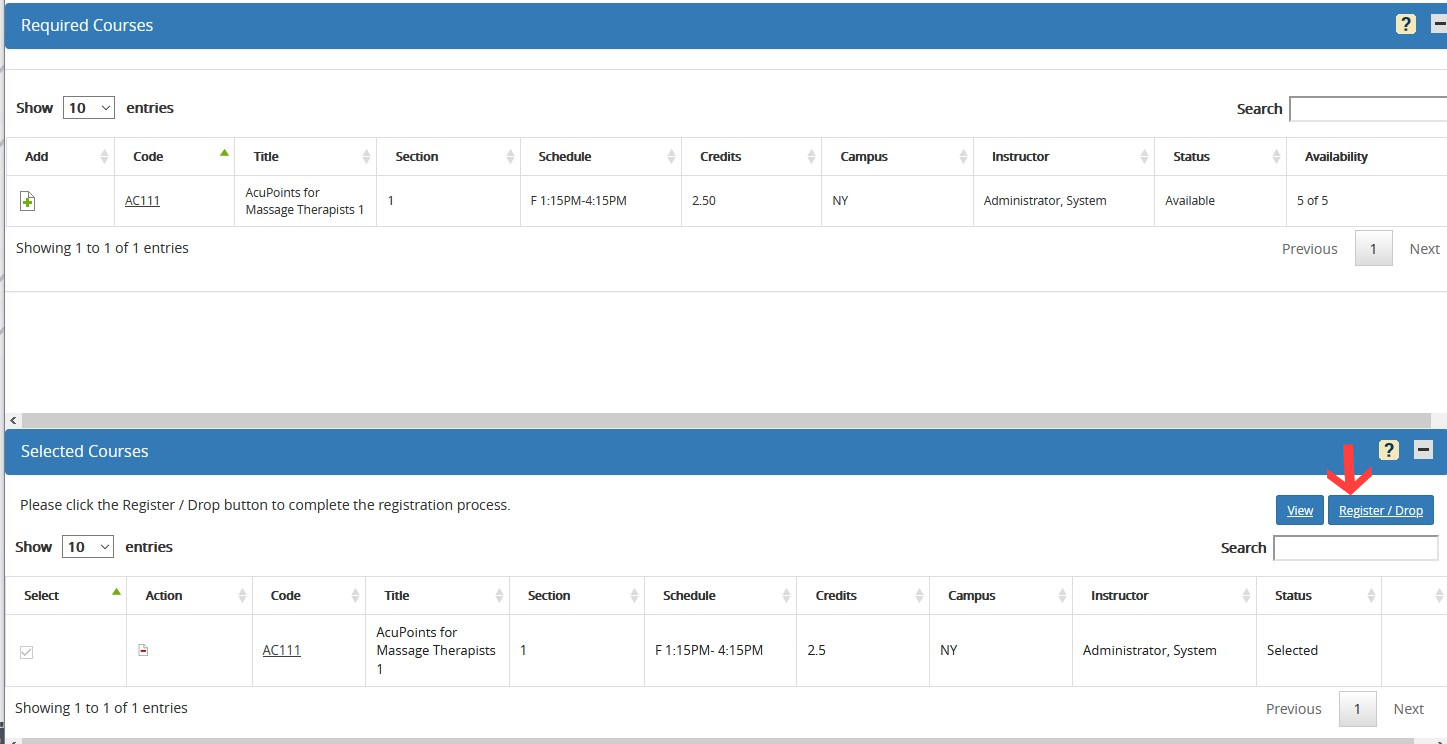
Step 6.
On the "Selected Courses" screen, please verify your selections. When finished, select "Register/Drop".
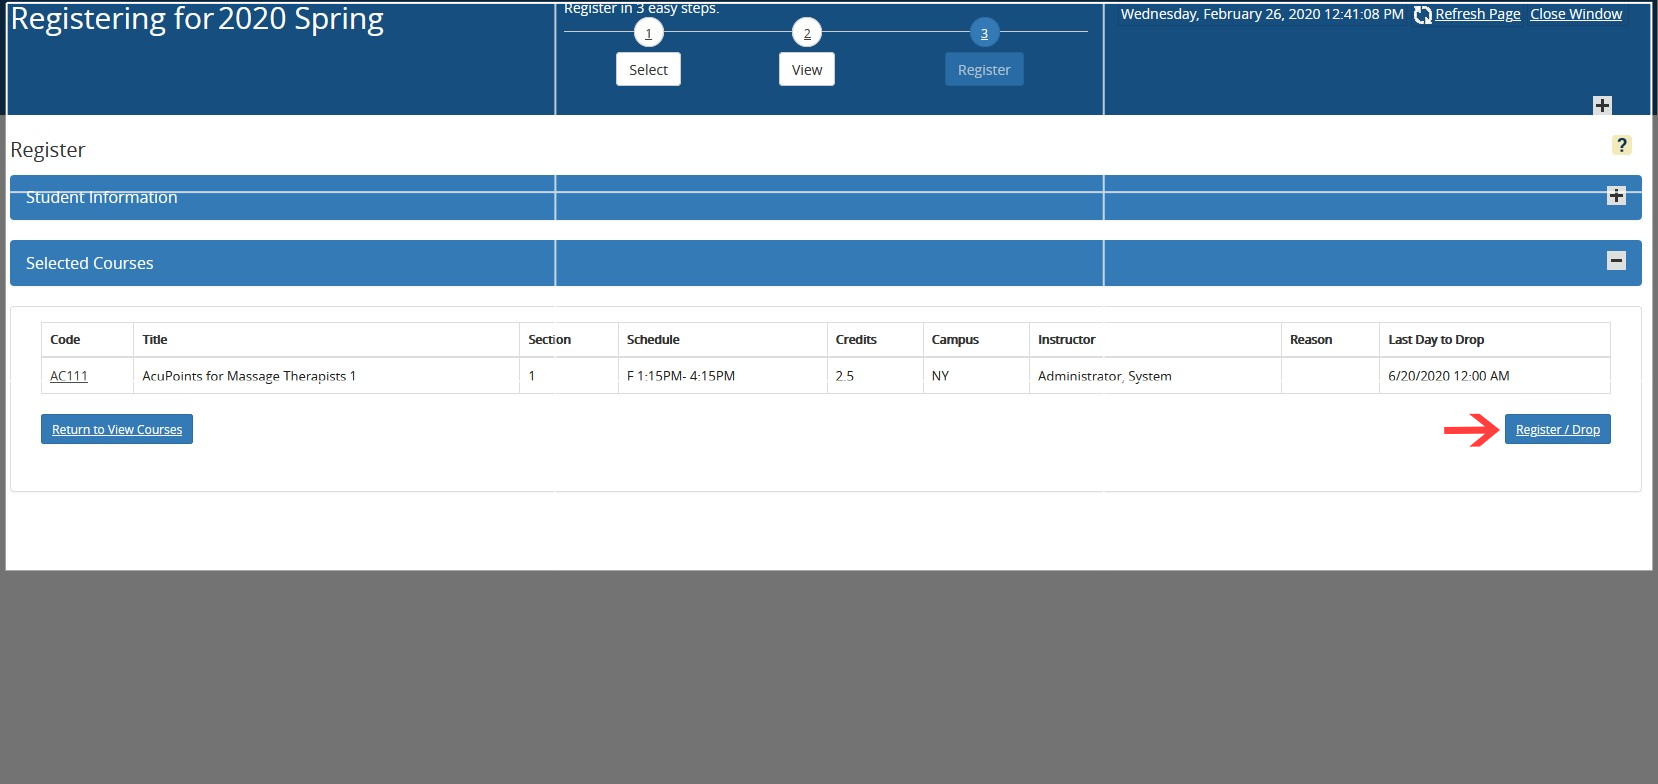
Step 7.
The confirmation screen will present your registration selections that were successfully processed.
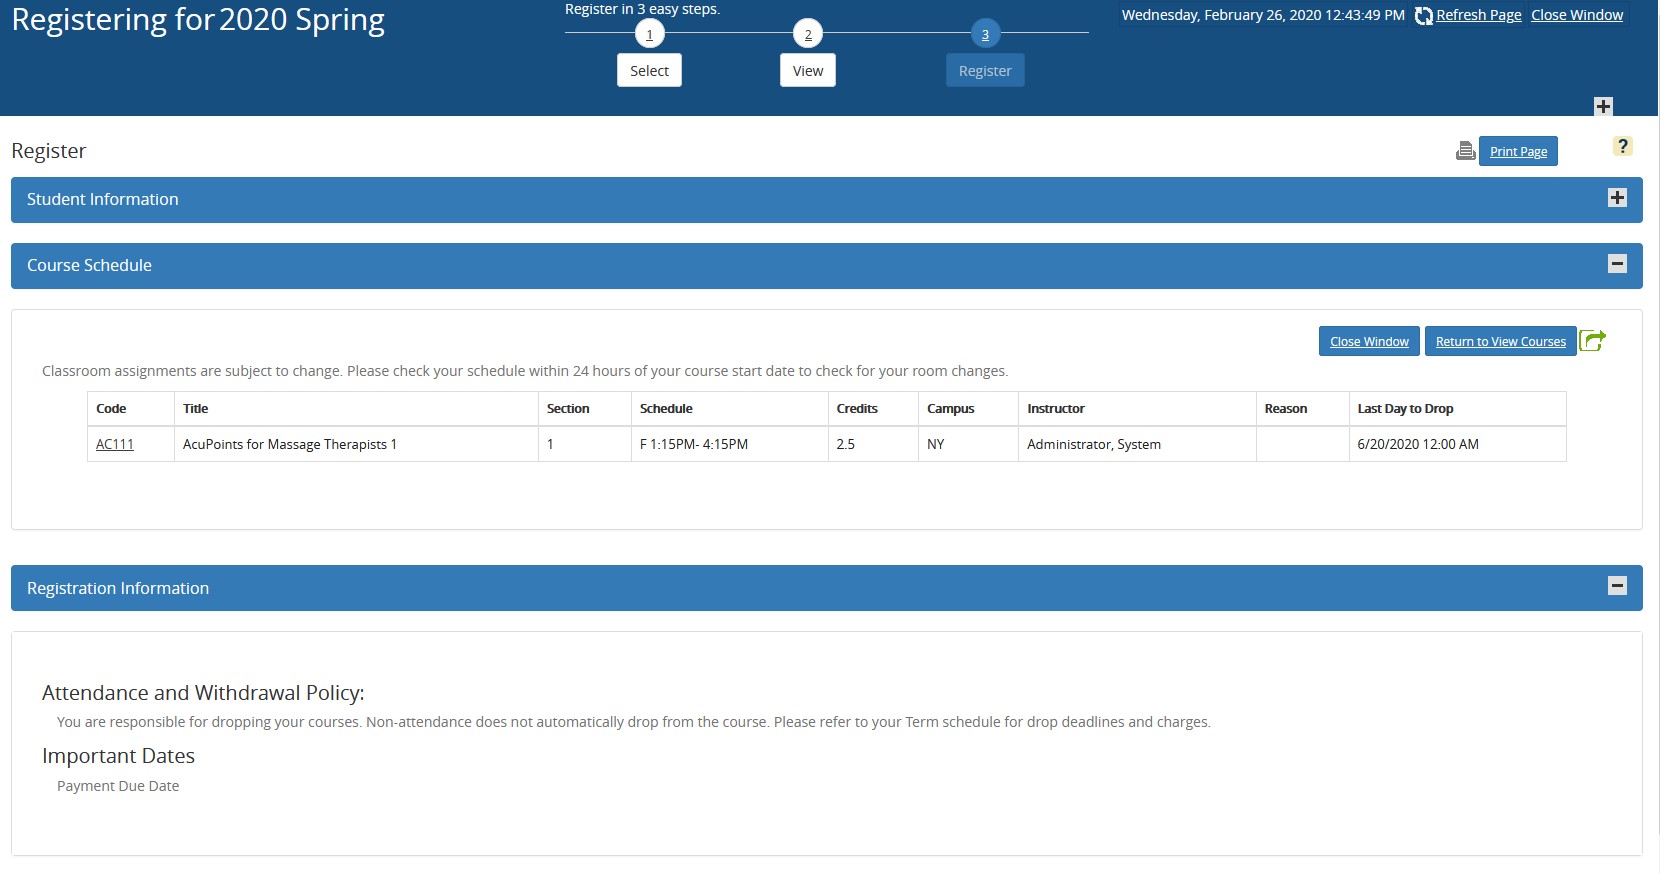
Registration Confirmations
Once you have registered for courses, you may check your successful registrations on the confirmation screen, main registration screen and by reviewing "Your Class Schedule" as a PDF file. Please be sure to review your schedule confirmations by the proper enrollment line.
Quick Add Panel:
Use the Quick Add feature if you know the Course Code and Section of a course you wish to register for.
Click Add to insert the Course and Section into the Selected Courses area.
If found and all applicable prerequisites or corequisites are met, the desired course and section is placed in the Selected Courses area. If any prerequisite and/or corequisite requirements are not met, a message appears below the Add button indicating why registration in the desired course is not allowed.
Registering for a Required Elective Course
Go back to the main registration screen. Refresh the page, if needed.

Select an Enrollment. If only one enrollment exists, the enrollment is already selected.
Select a Term. If only one term exists, the term is already selected.
Select "Register" to add and/or drop classes.
On the next screen, under "Course Search," change the search criteria from “Required” to “Elective”. Then select "Search" at the bottom of the screen.

The system will present the available elective options for your program of study. If your program of study does not have elective requirements, you will not be able to register via the Student Portal. Please contact an Academic Advisor or the Registrar's Office for further assistance.
From the list of available courses in the Search Results area, begin the process of adding courses to your schedule by clicking next to the desired course. A list of all course sections available for the selected course is displayed.
Please follow steps 4 - 6, as noted above.
Unregistering from Courses
Students can unregister from courses via the Student Portal up until the end of the add/drop period. Once the add/drop period closes, students must submit a Course Add/Drop Form to their Registrar's Office. Refresh your screen if needed. To unregister from a course via the Student Portal, see the steps below:
Step 1.
Once logged into the Student Portal, you will want to find the menu on the left-hand side of the page labeled "Academics" (highlighted below). Click the link.
Step 2.
Beneath Academics, click "Registration."
Step 3.
You will arrive at the main registration screen. Your registered courses will appear at the bottom of your screen.
Select the "Register" button.
Step 4.
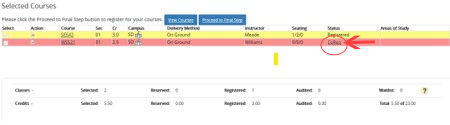
On the next screen, under "Selected Courses," select "View".
Step 5.
Select the red minus button, which will change to a green ➕ button. If, however, the course that you are trying to unregister is a corequisite to a course in which you are already registered, you must select and drop the corequisite(s) courses as well.
Step 6.
Once the green ➕ sign appears, your status will change from "Registered" to "Pending Drop." Select the "Register/Drop" button.
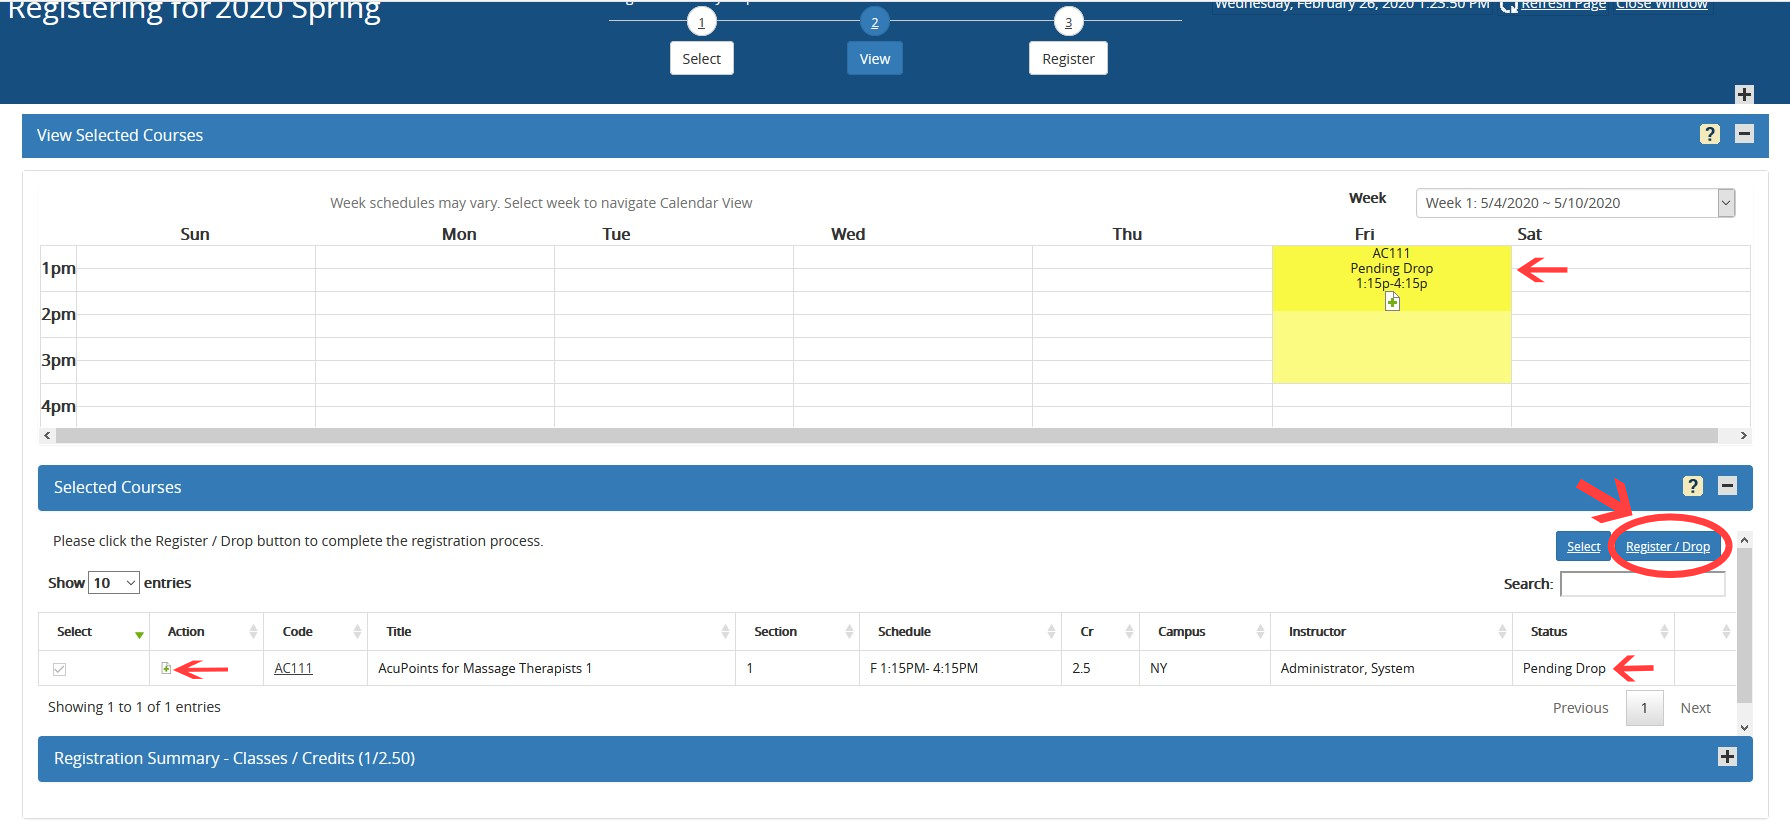
Step 7.
On the "Selected Courses" screen, please verify your selections. When finished, select "Register/Drop".
Step 8.
The confirmation screen will present your current registered courses. To re-register for the unregistered course, and co-requisite course(s), close this window and proceed to the main registration screen. Refresh your screen if needed. Follow the registration steps above.